
Users
Give someone access to Alivio: create their account, then choose what they can do with a role.
Create the account
From the side menu open Settings › Users, then click + at the top right.
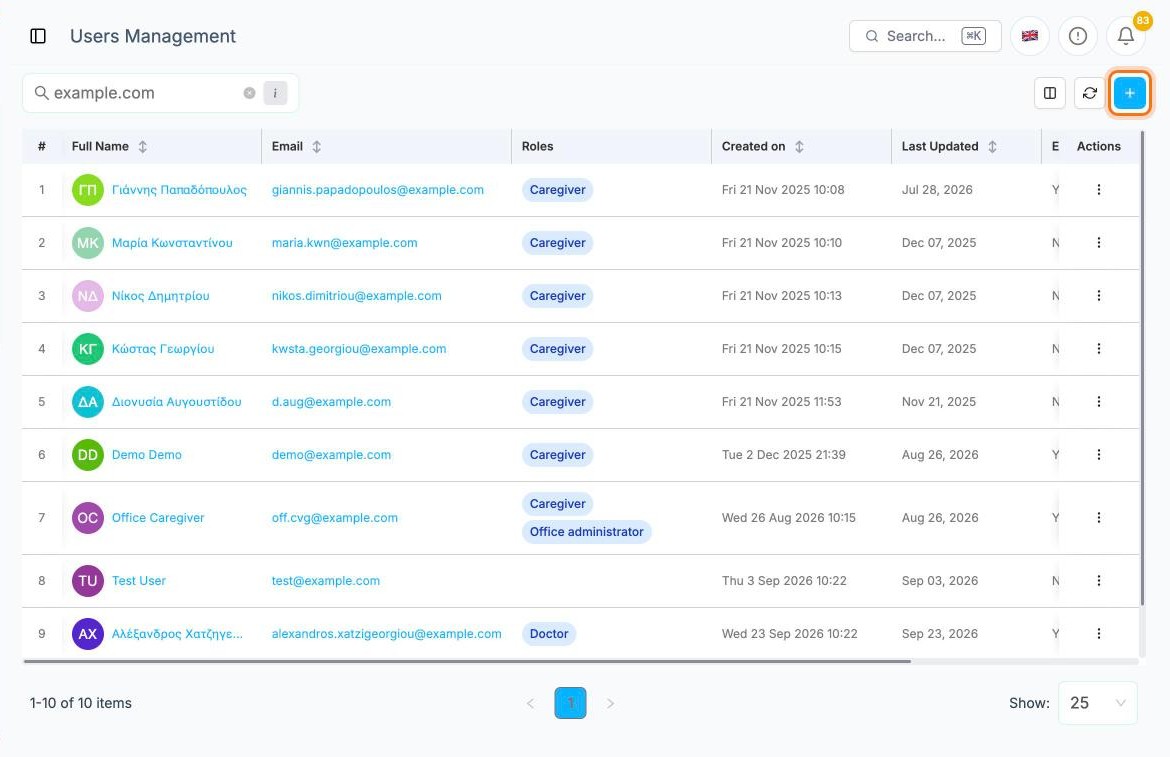
Fill in Email, First Name and Last Name.
Switch Enable User? on if the person should be able to sign in straight away, then click Save.
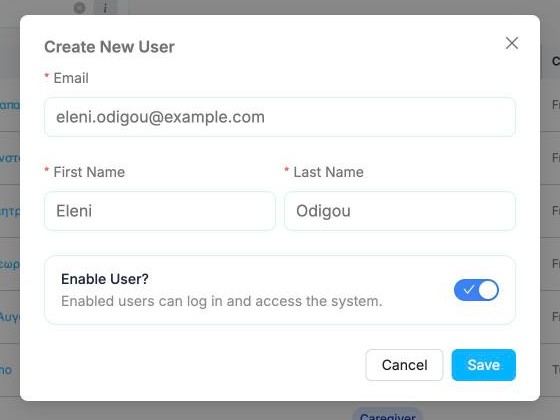
When an enabled user is created, Alivio emails them a link to verify their email and set their own password. You never choose or see their password.
Give the user a role
A new user has no role yet, so they can't do anything until you add one.
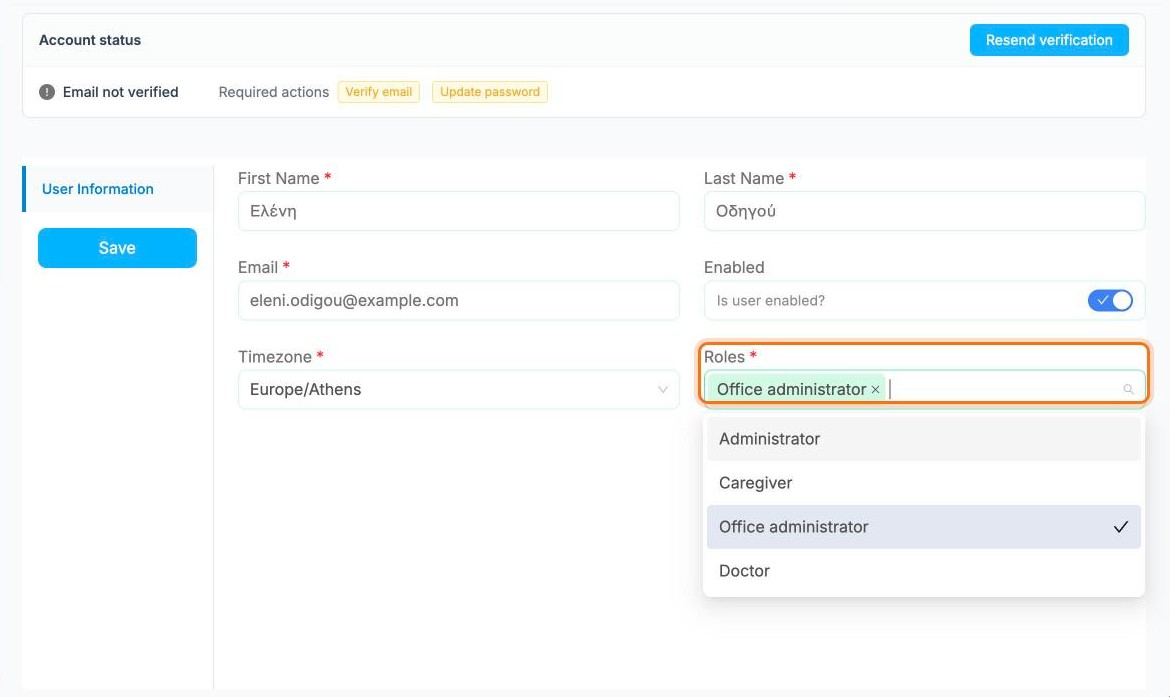
In the users list, click the ⋮ button on the user's row and choose Edit. In Roles, pick one or more:
| Role | For |
|---|---|
| Administrator | Full access, including billing and user management |
| Office administrator | Day-to-day office work: patients, requests, scheduling |
| Caregiver | Field staff who use the Alivio mobile app |
| Doctor | Doctors who follow their patients in the doctor portal |
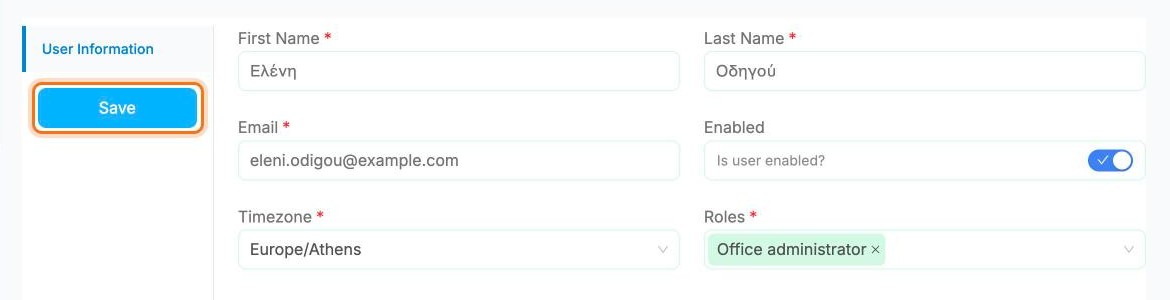
Click Save.
Shortcut: create the account from the Caregivers or Doctors list
For caregivers and doctors there's a faster way that also links the account to the person. You don't have to type anything again, and the right role is set for you.
Open Team › Doctors (or Team › Caregivers), click ⋮ on the person's row and choose Create user (Create User for caregivers).
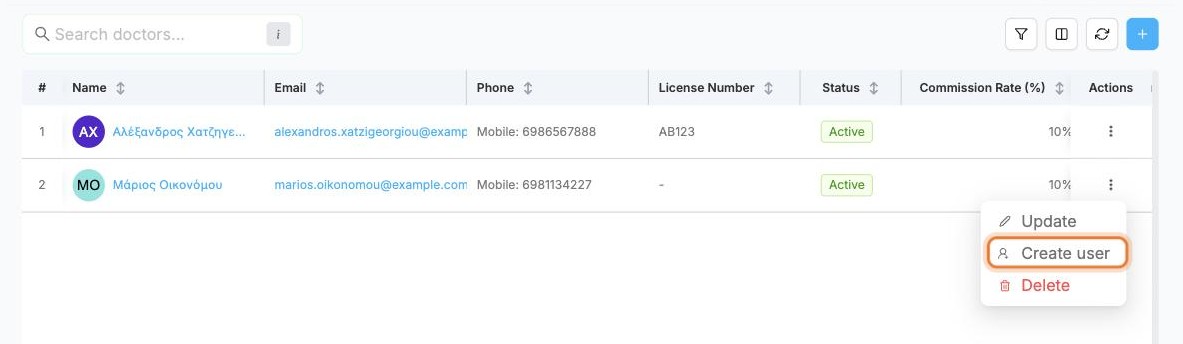
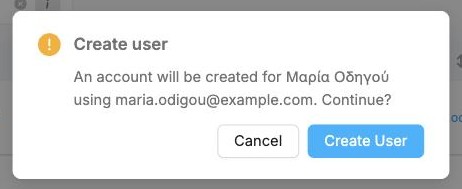
Confirm. Alivio creates the account from the person's email, gives it the Doctor or Caregiver role, links it to them and opens it. The account starts switched off: switch Enabled on and click Save to send the welcome email. See Caregivers for the full walkthrough.
TIP
Use the normal + on the Users page for office staff (Administrator, Office administrator). Use the shortcut for caregivers and doctors.
Check the account status
At the top of Edit User, Account status shows whether the person has finished setting up. Required actions lists what they still need to do, such as Verify email and Update password.
If they lost the email, click Resend verification.

TIP
To stop someone signing in without deleting them, switch Enabled off and click Save. Switch it back on at any time.